Showing posts with label How To. Show all posts

Saturday, March 9, 2013

How To Add A Slideshow From Picasa Web Albums To Blogger or Wordpress

Adding a Slideshow in your blog posts can always be a good option in order to present your content in a better way. Many sites offer services to make customized slideshows with a choice of "free" and "premium" services and the "free" option always have certain limitations. A better way to make a slideshow is to use Picasa Web Albums, with an added advantage of the 5GB storage provided by Google. You can also write your own slideshow code, but that would be a bit difficult.

Your slideshow will look something like this:

1. In order to make a slideshow from Google Picasa Web Album, goto the following link: https://picasaweb.google.com/home, log in to your Google account. If you don't have a Google+ profile then Picasa Web Album will open automatically but if you have a Google+ profile then you'll be redirected to your albums in your Google+ profile. In that case, a small message in a yellow box will popup at the top of the screen which will provide an option to go back to Picasa Web Album. After clicking on it, you'll be redirected to Picasa Web Album.

2. Now in order to create a slideshow, begin with uploading your photos from the upload option at the top bar.

3. After completing the upload process open the newly created album. Now on the right side bar you'll find an option of "Link to this Album." Clicking on it will display another option of "Embed Slideshow." Selecting Embed Slideshow

will popup a small window with some more options to customize your slideshow, like the one shown in the screenshot below:

4. Check the "HTML Links" option to get the HTML code of your slideshow. Copy and paste this code to the desired place. Quite Easy!

Friday, March 8, 2013

New Facebook News Feeds And How To Get It ASAP


On Thursday, Facebook unveiled its new News Feeds that offers a host of new options. The revamped version of the news feeds, inspired by mobile design of Facebook, will allow a user to adjust their feeds the way they want. It offers Multiple feeds in which a user can customize their feeds with options like friends, photos, music, following, games along with an option of a simple chronological news feed, most recent.

Although Facebook will automatically roll out this revamped version of news feed sooner or later, users can manually join the waiting list by clicking on the "Join Waiting List" button located at the bottom of this page https://www.facebook.com/about/newsfeed.

The newer version of news feeds will take away all the clutter and bring all the goodness of what is offered in Facebook mobile - bigger pictures covering 50% of the news feeds, iconized side bar, better cover design etc.

Tuesday, February 26, 2013

How To Use Tor On Android

A Tor network protects you against a common form of internet surveillance known as Traffic Analysis. While browsing or using any public network you should be aware of the fact that most of the websites can access your information including, but not limited to: your current physical location, your search requests, your interests etc. So, you can use Tor Network in order to stay anonymous and prevent Traffic Analysis protocol from accessing your information. Tor for Android can also be used to access the hidden part of the internet most commonly known as Dark Net or Deep Web.

UPDATED on 12th May 2018.

Learn more about Dark Net or Deep Web:
Beginners Guide to Deep Web or Dark Net.

Accessing internet through smartphones is a very common practice nowadays, and all those who prefer flexibility use Android smartphones. In order to use Tor on your Android device, you need to download Tor for Android from Google Play Store. Although Tor for Android does not require root permission, it can provide some extra features if you have got a rooted device, Transparent Proxying being one of them.

Download Tor for Android

In order to use Tor to browse through the internet on your Android device you can either download Orweb Browser provided by "The Guardian Project" or simply use a Proxy Mobile add-on for Firefox(for Android)


Tor for Android has tons of customization in its Settings menu, which also included Tor Tethering to enable Tor Transparent Proxying for WIFI and USB Tethered Android Devices if you are planning to use your Android internet connection on other devices. Others include Node configuration, bridges, relays, reachable addresses, hidden service hosting etc.

Monday, February 25, 2013

How To Remove Time Stamp From Blogger


Removing Time Stamp from posts can be of some advantage to bloggers. There are few posts in your blog that can be included in the category of  evergreen posts - those that will never lose their worth with time. Bloggers don't want a Time Stamp(indicating when the article was posted), that appears in SERP(search engine result page), to repel any user from visiting their page. So removing the time stamp from Blogger posts can be a good move to optimize your blog for search results.

To get more tips on blog optimization, please read:

Time Stamp can be easily removed by these two methods:

Method 1
1. Open the Layout settings of your Blogger page.
2. Click on the Edit option and uncheck the Time Stamp option from "Post Page Options".


Method 2
Sometimes the default method(1) to remove Time Stamp from Blogger Posts will not work if you are using a custom template, in that case you can use this method.
1. Open Template Settings of your Blogger Page.
2. Click on Edit HTML and  then click on Expand Widget Template.
3. Now search for this code in your template and remove it.
<b:if cond='data:top.showTimestamp'>
<b:if cond='data:post.url'>
<data:post.timestamp/>
</b:if>
</b:if>
4. Now you'd want to remove the respective CSS code of Time Stamp, so search for this code in your template:
.post-timestamp

and remove the entire code that follows it within its Parentheses. The code would look something like this:
.post-timestamp { background: url("#") no-repeat scroll 0 5px transparent; float: left; padding: 2px 0px 0 30px; }

Saturday, February 23, 2013

How To Make Your Website Popular


Although the word "popular" may loom large at first, but a certain amount of knowledge will enlighten you with the fact that making a popular website is not entirely impossible and almost everyone has to start from scratch. Creating an impressive line of followers will most likely take a certain amount of hard work and dedication, but almost every internet user is impressionable, to a certain extent, when it comes to quality work and useful information.

This tutorial will guide you through the basic concepts to give you a kick start. If you wish to learn more about any of the contents in this tutorial I'd suggest you do more research of your own(on wikipedia), but this will be enough to get you off your feet and start getting somewhere.


  • SEO
  • Social Media
  • Promotions


SEO(Search Engine Optimization)


SEO consists of everything your website contains, (Domain name, Page titles, META tags, text, images, loading time and the type of content your website displays). With the popularity of search engines today, if you don't implement SEO into your website then you are instantly sticking a limit on the reach of your website. Millions of people search on Google every day for products or services they desire, advertising is becoming less and less effective as people don't just look at an advert and instantly get the desire to buy. People know what they want and when they want it, they will find it themselves, meaning that if you're not displayed on Google when they search, then they're going straight to your competition.

The niche of your website is everything. There are thousands of competing websites on the internet. If you're going to make a website, you need to make sure that you're in a position to beat your competitor. Search keywords that relate to your website/website-idea and check what results you get, who would you be competing with? Now put your search terms in quotations (i.e. "cheap laptops") and look how many search results there are. This will tell you how many websites you're competing with for that specific keyword. The aim is to find a keyword that has a little competition as possible.

To get an analysis of the competition and the searches per month of certain keywords, go to the Google Keyword Tool and type in a few keywords to check. Make sure you change the options to set your location to wherever you're from (United States, United Kingdom, China, India etc) and make sure only the "Exact Term" box is ticked on the left of the page instead of the "Broad" box to get the true results.

Now that you know what keywords are best to base your website around, it's time to start implementing those keywords into your content. The places you need to consider are:
  • The Domain - Although this doesn't have a major effect with search engines, it still has some; meaning that it could help you rank higher, faster.
  • Page Titles - Think about the content that will be on each page and what the best keywords are for that content. The title is the most effective placement for keywords.
  • META Keywords - These are becoming less and less effective in search engines, but they are still quite powerful at allowing Google to determine the identity of a website. This means that Google can easily see which keywords you want the website to be listed under and will improve your chances of listing higher. Make sure you use a selection of keywords that relate to the name of the website and the keywords that you chose using the Keyword Tool.
  • META Description - This is what search engines use to describe your listing on search results. This is also a very powerful factor in SEO, as it is has a big impact on what keywords you're listed under. This is also the first thing that people will see on your website, before they even click the link meaning that it needs to look appealing. Make sure your description is short, readable and contains your main keyword(s)
  • Headers - The use of headers in your content is vital, it's like titling your work in school. It allows search engines to identify the important content on your website. These headers are used with HTML tags. Having content headers that include the websites keyword lets search engines know that this keyword is important, again giving you a better chance of listing higher. 
  • Page Content - In order for your website to rank high, the content on the website needs to comply with a number of factors. It needs to be unique. Stealing content will dramatically lower your rankings. It needs to be updated. Having a website that doesn't change at all will let search engines know that it is in fact dead. It needs to be relevant. Make sure that you use the keywords in your content and that it's actually readable by humans.

Social Media


Again with SEO, the popularity of social mediums like Twitter, Facebook, and most importantly Google+ and YouTube is necessary.

Twitter and Facebook are probably the least effective, however they can have a massive impact on the popularity of your website if done correctly. Make sure that your pages are not only recognizable for your brand, but also contain the keywords you have researched within their content. Once you've done this you can start off by inviting your friends. The most important thing to consider when using social media is that people do not buy through Facebook. It's simply a place to raise awareness of things, so make sure that people can easily get involved with your posts and that your posts are relevant, interesting and regularly updated.

Google+ is a new social medium that Google is taking way too seriously. It's now one of the most effective social mediums in terms of SEO, it's important that you make a Google+ page that is linked to your website by using the Google+ publisher tags on your website. Again make sure that your Google+ page is SEO'd and it is regularly updated with new, relevant content.

YouTube is possibly the most beneficial form of social media in terms of driving traffic to your website. This is because you are able to directly talk to your audience and show them what you have to offer. However, YouTube videos require a bit of work to make sure they get popular.

Promotions


People love getting a bargain or better yet, free stuff. To help get your website off the ground I suggest you make a competition or a free giveaway to new registrants. Something that will get the word out about your website.
The best things to do are things like:
  • Referral competitions (Most referrals wins a prize)
  • Random giveaway to 3 lucky members on the website
  • GPT (Get paid to) i.e. Like my Facebook, Twitter and Google+ page and win a prize


Monday, December 24, 2012

How to remove Babylon Toolbar

If by chance you ever come by a software that asks you to install babylon toolbar or else if the software forces babylon toolbar on you and if you decide to continue the installation, then probably you are in deep trouble as once installed it will change the default search engine and the homepage of every browser you have on your system. And even so if you change your mind and try to remove this malware by uninstalling it from your system, let me tell you, you won't be able to do that unless you follow these instructions.


How to remove Babylon Toolbar

STEP 1: Uninstall Babylon Toolbar from your computer

Uninstall Babylon and Babylon toolbar for IE from your computer
To uninstall Babylon Toolbar program from your computer,click the Start button, click on Control Panel,the select Uninstall a program. (Add or Remove Programs for Windows XP users)
In the Add or remove programs list search for Babylon program,then double click on it to uninstall it.


STEP 2 : Remove the Babylon Toolbar residual damage from your browser

Remove Babylon Toolbar from Internet Explorer
1. Open Internet Explorer,then click on the gear icon  (Tools for Windows XP users) at the top (far right) and click again on Internet Options.


2. Now in the Internet Options dialog box, click on the Advanced tab, click Reset.


3. In the Reset Internet Explorer settings section. Click Reset again in the information dialog box.


4. When Internet Explorer finishes resetting, click Close in the confirmation dialogue box and then click OK.
5. Close and open Internet Explorer again.


Remove Babylon Toolbar from Mozilla Firefox
1. At the top of the Firefox window, click the Firefox button, go over to the Help sub-menu (on Windows XP, click the Help menu at the top of the Firefox window) and select Troubleshooting Information.


2. Click the Reset Firefox button in the upper-right corner of the Troubleshooting Information page.


3. To continue, click Reset Firefox in the confirmation window that opens.
4. Firefox will close and be reset. When it’s done, a window will list the information that was imported. Click Finish and Firefox will open. That’s it – you’re done!

Or

1. Launch the Firefox browser by clicking "Start," "All Programs," then "Firefox."
2. Click the "Tools" menu located at the top left of the Firefox browser.
3. Click "Add-ons." Click the "Plugins" tab.
4. Scroll down and click "Babylon."
5. Click the "Disable" to disable Babylon from Firefox.
6. Click "Start," then click "Control Panel." Click the "Programs and Features" icon.
7. Scroll down the list of installed programs and click "Babylon." Click "Uninstall."
8. Click "Yes" when asked if you want to remove Babylon from your computer. Click "Finish" to complete the process of removing Babylon from Firefox.


Remove Babylon Toolbar from Google Chrome
1. Remove the  Babylon Toolbar extension from Google Chrome.Open Google Chrome and Click the Chrome menu  on the browser toolbar.Click Tools and then select Extensions.

2. In the Extensions tab,remove (by clicking on the Recycle Bin) the Babylon Translatorplugin and everything related to Babylon.


3. Replace the Babylon search with Google as default search engine.Click the Chrome menu  on the browser toolbar.Select Setttings and click on Manage search engines in the Search section. Select Babylon Toolbar Search from the list and click the X that appears at the end of the row then select Google (Default) from the list and make it your default search engine.


4. Change the Babylon homepage to the default one.Click the Chrome menu  on the browser toolbar and select Settings.

Pick the page you’d like to be your home page in the “Home page” section. You can select to use the New Tab page as your home page. To use another page, click Change once you’ve selected “Show Home button” checkbox. Remove the babylon search page from "On startup" option.


STEP 3: Remove Babylon registry keys with AdwCleaner.
1. You can download AdwCleaner from the below link.
ADWCLEANER DOWNLAOD LINK (This link will automatically download AdwCleaner on your computer)
2. Before starting this utility,close all open programs and internet browsers.
3. Double click on adwcleaner.exe to run the tool.
4. Click on Delete,then confirm each time with Ok


5. Your computer will be rebooted automatically. A text file will open after the restart.

6. NEXT,double click on adwcleaner.exe to run the tool.
7. Click on Uninstall,then confirm with yes to remove this utility from your computer.


STEP 4: Remove Babylon Toolbar files with Malwarebytes Anti-Malware FREE
1. Download the latest official version of Malwarebytes Anti-Malware FREE.
MALWAREBYTES ANTI-MALWARE DOWNLOAD LINK (This link will open a download page in a new window from where you can download Malwarebytes Anti-Malware Free)
2. Start the Malwarebytes’ Anti-Malware installation process by double clicking on mbam-setupfile.
3. When the installation begins, keep following the prompts in order to continue with the setup process. Do not make any changes to default settings and when the program has finished installing, make sure you leave both the Update Malwarebytes’ Anti-Malware and Launch Malwarebytes’ Anti-Malware checked. Then click on the Finish button. If Malwarebytes’ prompts you to reboot, please do not do so.


4. Malwarebytes Anti-Malware will now start and you’ll be prompted to start a trial period , please select ‘Decline‘ as we just want to use the on-demand scanner.


5. On the Scanner tab,select Perform full scan and then click on the Scanbutton to start scanning your computer.


6. Malwarebytes’ Anti-Malware will now start scanning your computer for Babylon Toolbar malicious files as shown below.


7. When the scan is finished a message box will appear, click OK to continue.


8. You will now be presented with a screen showing you the malware infections that Malwarebytes’ Anti-Malware has detected.Please note that the infections found may be different than what is shown in the image.Make sure that everything is Checked (ticked) and click on the Remove Selected button.


9. You will now be presented with a screen showing you the malware infections that Malwarebytes’ Anti-Malware has detected.Please note that the infections found may be different than what is shown in the image.Make sure that everything is Checked (ticked) and click on the Remove Selected button.


Now your system is good to go, the way it was meant to be, free from babylon toolbar.

Thursday, January 26, 2012

Get Maps on Android Devices for Offline Usage

It doesn’t matter what carrier someone uses, there is always the possibility of ending up somewhere where there is no signal and no roaming. In times like those, it is not comforting knowing that your only source for navigation requires a data connection of some sort.

The process is pretty straightforward and completely free and just requires a little patience as it requires creating an atlas, rooting around on your sd card and placing files in specific places.

There are many application in the market which have feature for offline maps or cached maps like google map, rmap, oruxmaps, ublox, locus etc. (these are the maps that i have tested and used by me)


So, here is the guide.

First of all you need one of the above mentioned software installed on your Android phone (all the above apps are free of cost)

Next you need the offline maps and the guide is as follows:

Step 1. You need to download/create offline map and you will need to download Mobile Atlas Creator (also known as MOBAC and it is a free open source software) tool with SQLite library. Java Runtime Environment should be installed on your computer since this software is based on java. ( Google the software to download it )
Step 2. Run Mobile Atlas Creator and from the drop-down box in the left upper corner of the screen select map provider.
Step 3. Using the mouse select the area you want. You can zoom in and out using the scroll button.
Step 4. Choose zoom levels for you offline map. Please note that creating maps of a large area with high resolution will result creating data file several gigabytes in size.
Step 5. Enter a name of your map and click “Add selection” button.
Step 6. Select the desired format from “Atlas settings” drop-box.
Step 7. Press “Create atlas” button and the download of the maps will begin and be quite patient because it might take time depending upon your internet download speed.
Hurry you are half way done with the offline maps.
Step 8. Once completed, open the folder with your atlas file. Copy the file on your Android device to /sdcard/"your app folder"/maps folder.
Step 9. Open the android application and press Menu button and goto settings and select the user defined map i.e. the one you placed on your sdcard.


How to save Google maps for offline use on android and you can save your bucks

Enable the Google Maps Labs Map Pre-caching:

1. Open Google Maps android app.
2. Press Menu button->More->Labs->Precache map area.
3. Now when you search for a location, click on the map label that appears.
4. In the location view, press Menu.
5. Press Precache map area.

This can be used to view 10 miles around the selected area (offline).

Here you go. All is set and you are good to go. (Note: The first start up might take time but the consequence will not)


Sunday, October 23, 2011

How to get better audio quality on Android

Certain genres of music sound better when the bass, treble, and other frequencies can be adjusted higher or lower. If you're on the Gingerbread flavor of Android, you're in luck.
Note: This how to blog post is for users on Android Gingerbread. If you're still on Froyo or older, you'll have to grab a music player with an equalizer built-in, since you can't adjust the settings across the entire device. PowerAMP is a great app to start with for Froyo users.


Grab Equalizer from the Android Market, and open the app. You will see several preset values for different types of music. If you're not looking to do much fussing with the app, you can select one of these settings or even the autodetect option check box and be done.


Navigation in the app is done by swiping to the right and left for other screens with more options. If you go one screen to the right, you can view custom presets. However, if you haven't created any of these yet, then simply click the green plus sign to add a new one.


Swiping to the next screen on the right will show you a live equalizer that can be adjusted. Here you can press the play button to listen to a sample track, open a song from your own music, or even save your settings.


The last screen on the right allows you to turn on Equalizer's Bass Booster, Virtualizer, and Reverb. You'll need to press the power button in the top-right corner of the app, and then check off which features you'd like to enable in order to adjust each.


Equalizer offers two widget sizes, both showing the five adjusted frequency bars. A good place to put one of these is near your music player widget, if you're using one.

Tuesday, October 4, 2011

How to use Facebook Music


With it new feature you can listen, share and discover music with others, all from within Facebook. If you're ready for the experience, here's how to use Facebook Music:


How Facebook Music works
The idea behind Facebook Music is that whenever you or your friends listen to music from one of Facebook's music partners, the music gets published to your Timeline for friends to see. The details also show up as an update to the news feed and ticker. When your friends see that you've recently listened to "Give Me Everything (Tonight)" by Pitbull, they can click on the link to listen to it. If they see your activity in their ticker, they can click on the activity to begin listening to the song with you in real time, with the option to start a chat.


How to Setup Facebook Music

To start sharing music on Facebook, a link between the music service and Facebook needs to be established. Spotify, Mog, Rdio, iHeartRadio, Slacker, Earbits, Turntable, SoundCloud, and Rhapsody all work with Facebook Music.
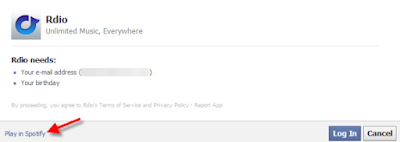
To create the link, log in to the music service of your choice, and initiate the service's feature to share or link to Facebook. This will activate the link and once you approve it, the music service will show up as an app in your Facebook account. This is how it looks for Spotify on Facebook:


How to Use Facebook Music 

The listening activity of your friends shows up in your news feed, ticker, and their Timeline. You can also click on the Music app in the left sidebar, to view all of your friends' listening activities, including top songs and trending albums. If you prefer to bookmark that section, here's the direct link.


To listen to a song that a friend recently listened to, simply click on the play link. If you already have the music service up, the music will begin playing through their Web app or desktop app. If you don't already have the music service up, a pop-up window will appear, asking if you'd like to launch it.


If you're not using the same music service as your friends, you have the option of creating a new link (and a new account) or listening to the song with your preferred music service.


Adjusting Facebook Music Permission
If you're concerned about privacy and permissions with the apps in Facebook Music, there are ways to adjust them to suit your preference:


That's it. Enjoy listening, sharing, and discovering music with your friends--or snickering about their terrible tastes. Either way, it's win-win!


Thursday, September 8, 2011

Create Ultra Secure Passwords

Do you think your password is secure? Are you sure you won't get hacked because of your insecure password? Don't worry, let me save your day!
Following tips will help you in making easy to remember Ultra Secure Passwords:

1. Using Uppercase and Lowercase letters, numbers, and symbols
Nowadays, most of the websites are encouraging the use of good password practices by forcing you to input a mix of numbers, letters, symbols, and mixed capitalization. This approach is definitely the right idea as mixing it up can pay off, statistically speaking. Why? Because most password hacks are done using a technique called "brute force attack", in which automated computer softwares are used to guess every possible combination to crack your personal code.
According to a study, automated hacking software can break into 1000 accounts in just 17 minutes. If you introduce more variables into your password — namely numbers, symbols, and a mix of lower and upper case letters — brute forcing software will take longer to crack your password and sometimes make it completely impossible to break in if the password is properly chosen.

This is what using Uppercase and Lowercase letters, numbers, and symbols does:
* Adding letters: Since there are 26 letters in the alphabet, one additional letter can make your password 26 times harder to crack.
* Using a mix of lower and uppercase letters: Mixing up your cases adds complexity and safety to your chosen password.
* Adding numbers: Using letters, words, and phrases for your passwords seems both natural and easy to remember, but it's much safer to diversify.
* Adding symbols: Symbols are the real secret ingredient to security. Since there are over 1500 symbols a hacking program needs to run through to correctly lock down one character of your password, adding one extra asterisk or exclamation point can make it 1500 times more difficult for intruders to pry open your personal accounts.


2. Password Strength depends on Password Length
Most websites prompt you to create a code with a minimum and maximum amount of characters. Since each additional character increases your odds of staying safe, be sure to max out the length of your password. If you can enter 14 characters, don't stop at 10 — those extra 4 characters will work to your statistical advantage.
Here's an example: compare the passwords g00se12 verses g00se12@!@!@!
As you can see g00se12 might be faster to type, but g00se12@!@!@! is a far more safer. How much safer? According to a handy online brute force simulator, hackers could crack g00se12 in less than a second. What about g00se12@!@!@! then? Assuming that the hacking software is guessing one hundred billion combinations a second, believe it or not, it could take the same software almost 200,000 centuries to crack it.


3. Increased Symbol Usage = Increased Password Strength
A simple technique to strengthen your password is to use a technique called "password padding." Conventionally, use of random passwords like Ub3`t3^#b|@ is perceived to be the best, but the reality is that people can't actually remember these totally random passwords, so they don't end up using or sticking with them.
To solve this dilemma, check out the following example:
Which of these is easier to remember? Which is more secure?
Ub3r!)!)!)!)!)!
Ub3rmG4Dr15t99
The more memorable password is Ub3r!)!)!)!)!)! since it looks like the familiar word "Uber" and ends with a repeating pattern of symbols. Ub3r!)!)!)!)!)! is also the more secure password because, while it too has numbers, letters (upper and lowercase), and symbols, the first example is one character longer than the random second password — and it has more symbols.


4. Storing your Passwords in Password Manager
Programs or apps, known as password wallets or password managers can lock down your cache of codes by encrypting them, which translates them into a secure language that hackers can't parse.
While no method is infallible, well-regarded password managers like 1Password are great options. With a password manager, you'll use a master password to access the program or app, and it will auto-fill password entry fields for you as you log in around the web. 1Password supports Windows, Mac, iPhone, iPad and Android, so you can keep both computer and your phone locked down safely.

Tuesday, September 6, 2011

Post More than 500 Characters in your Facebook Status

Has your Facebook status ever been too complicated to describe in less than 500 characters? The current maximum length of a status update on Facebook is 500 characters. If you exceed that number you will get this annoying error message:
Status updates must be less than 500 characters. You have entered 3,850 characters here. Notes can be much longer. Would you like to edit and post your update as a Note instead?

Well, I know that you can use Facebook Notes for this purpose, but wouldn't it be really awesome and catchy to update such long messages directly as your Status instead of using Notes for it?

Sometimes you may have a lot to say but you don’t want to post it in a note. Well I'm here to save your day! With this cool little loophole in Facebook you can post as many characters as you want. This also means you can use some of our cool Status Art to spice up your status.

This is how it works:
All you have to do is to upload a tiny picture which is/isn't prominently visible. This is done by using the Photo Sharing option and selecting the “Upload a Photo”.
Now simply grab any picture off your hard drive, a tiny one in case you don't want the picture to get displayed prominently or a good sized picture which you think will go well with your long status update.

Once you are done with selecting an appropriate picture, you can write as much as you want! Part of your message will be covered up by a “See More” link, but its better than nothing.


Finally your Long Status Update would look something like this: